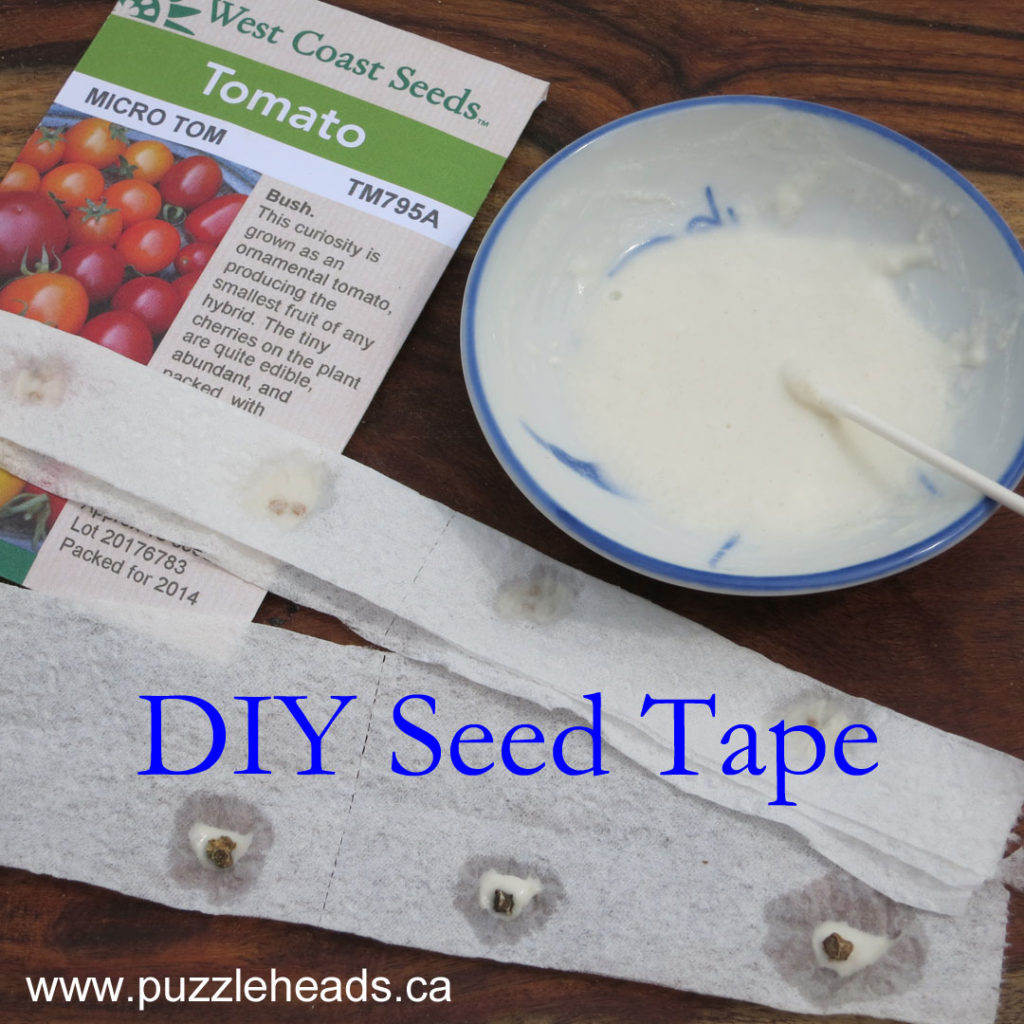
Here’s a fantastic little activity that is perfect for the budding little gardeners in your classroom or at home. You’ll have all the materials readily available from home, except perhaps seeds.
Excellent spring classroom activity
You may have noticed that some plant and vegetable seeds are now available for purchase already embedded in a long strip of biodegradeable material. The seeds are perfectly spaced and all you have to do is unroll the tape to the length you need and plant it directly into a shallow depression, cover with soil and water. This alleviates the problem of trying to handle and space tiny seeds and it’s quick.
This presents a perfect activity for little hands to get busy with in the classroom. Forget the garden center – just head to the bathroom and grab some toilet paper!
In addition, this activity has many levels of adaptability to a variety of ages and you can even throw in some math.
Gather Your Materials
Toilet paper
Scissors
Marking pen
Ruler
Flour and water to make a flour paste
Q-tips, small paint brush or popsicle sticks – something to dab the flour glue with
Seeds – small, medium or large depending on your child’s finger dexterity
How to Make the Seed Tape
Step 1
Tear off a length of toilet paper about 40cm (16″) long. Fold in half, short ends together. Cut down the centre with scissors. You should have 2 long strips of toilet paper 40cm long and about 5cm (2″) wide.
Step 2
Measure seed spacing with a ruler and mark little dots at 5cm (2″) intervals on the edge of both strips. Adjust the seed spacing depending on the type of seed you have.
Step 3
Mix a couple of tablespoons of flour with water to make a paste.
Step 4
Dab dots of the flour paste with popsicle sticks, a paintbrush, skewers or Q-tips along the toilet paper strips where the marks are.
Step 5
Fold the toilet paper in half lengthwise now to cover the dots of flour paste and seeds and press lightly. When dry the seed tape can be rolled up until ready for planting. Plant the strip of seed tape intact in the garden covered with the amount of soil suggested on the seed packet. The strip can be cut into smaller lengths for planting in smaller containers.
Watch the video below!
Throw in some Math!
Many extensions for practical math learning can be built around this activity depending on the age groups you have.
Measuring the length of toilet paper – older children can do this themselves straight from the roll. You may need to provide ready cut lengths for younger children.
Measuring the seed spacing – older children can figure out how to measure the spacing using a ruler. Younger children may need a measuring guide.
Mixing flour and water – older children can choose a tablespoon measure from the group of measuring spoons. Younger children may need a smaller set to choose from – try providing only the smallest and largest measuring spoons for them to choose from. Or create a mini lesson to organize the spoons from smallest to largest.
Counting seeds – choose seeds depending on your child’s finger dexterity. Larger seeds like pea or cucumber seeds are easier to count one by one than carrot or onion seeds. Larger seeds are planted individually and smaller seeds can be grouped a few together on the seed tape.
Wonder and Explore
It’s fun to choose different seed types, explore how different they each look and what plants they will grow into. Take time to wonder and explore about where the seeds are located in different plants. If you want to save some seeds from your carrots to plant next year, where do you get the seeds from the carrot plant??
Does the size of the seed have any relation to the size of the plant? How can those tiny carrot seeds grow into small globe shaped heirloom carrots or gigantic, monstrous juicing carrots? Marvel at the thought of growing a towering pine tree from a single seed from a pine cone.
Gather an assortment of bean seed varieties. Bean seeds are so beautiful to look at and compare. They feel so smooth and silky in your hands. With all their colourful swirls and speckles they are almost a shame to plant!
Conservation and the Environment
Check out the post on For Peat’s Sake – Save the Peat Bogs and learn about how unsustainable and non renewable this precious resource really is. Don’t buy peat seedling pods, make your own Easy DIY Newspaper Seedling Pots.
Creating a lesson to learn about peat, bogs and marshes? Check out this glossary.
Here’s the video…
…with clear instructions on how to proceed from Rob Bob’s Backyard Farming & Aquaponics! Love the chirping birds and farm sounds in the background! Make sure you watch to the end where he talks about using coir (coconut husks) to cover the seeds with. Coir is an excellent Peat Alternative and very sustainable.
Have fun and post your comments!


