Mmmmmmm…Cinnamon!
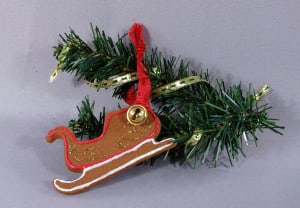
It’s funny how certain spices are associated with particular holidays and foods, just like certain colours have become associated with different festive themes. Cinnamon is one of my favourite spices so I look forward to unpacking the Christmas decorations every year and finding the Cinnamon Ornament my daughter made in her casa class many years ago. The first thing I always do is smell it. Even now, a good 5 or 6 years later, can you believe it still has some of that lovely scent? This recipe is super easy! Make the dough with your little elves or have it prepared in advance ready to roll.
Cinnamon Ornament Recipe
Yield – will depend on the size of your cutters and thickness of shapes. This recipe is enough for a class of about 15 – 20 kids.
There are many variations of this recipe but I find this one works well, with the least ingredients and no baking. You can’t go wrong with 2 ingredients!
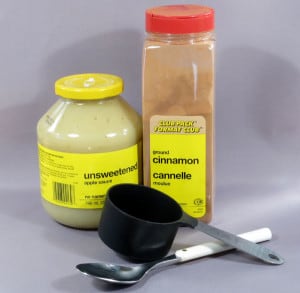
2 cups apple sauce
3 cups cinnamon
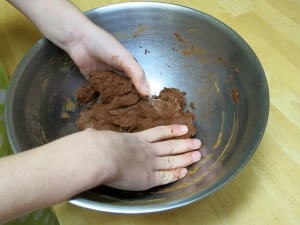
Don’t bother with the organic apple sauce 🙂 get the cheapest you can find. Same goes for the cinnamon. One of those large 500gr restaurant size spice shakers is perfect. Put the apple sauce and cinnamon in a bowl, mix with a spoon then knead with your hands. Add more cinnamon if it’s too sticky or a little apple sauce or water if it’s too dry. It will depend a little on your cinnamon and how watery your apple sauce is.
The quantities are not that scientific – when it no longer sticks to your hands so much, then it’s probably ready. Remind your little elves not to eat the dough, even though this recipe doesn’t include glue. (OK I admit we tasted it anyways, but it was so strong we had to spit it out. Just don’t let your helpers catch you doing the same).
Make a ball, cover the bowl with plastic wrap and let it stand about an hour. Not sure why you have to do this, but as we prepped ours before dinner it ended up resting for at least an hour anyways. Roll it out on parchment or waxed paper, ideally on a piece that you will leave it on to dry and just peel away the excess. If it’s still too sticky, simply dust the dough or rolling pin with more cinnamon, or knead in some more. We rolled ours thinly, to just shy of 1/4″, but found that thicker ones would be better. I made half the recipe and got about 20-22 thin ornaments.
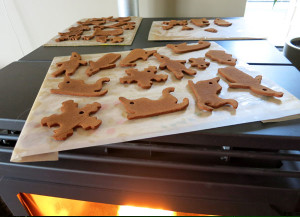
Cut out the shapes, cut a hole for a ribbon (use a straw) and place them on parchment or waxed paper on a board to dry (so they’re easier to move if needed). They took about 4 days to dry completely. Take this into account if you make them thicker. Use cutters that are simple and compact – reindeer shapes with legs and antlers sticking out are too fragile (another tip from personal experience….). Some recipes call for drying in the oven on low heat (200F for 2-1/2 hrs) but obviously not all schools have access to this. Air drying is perfectly acceptable – just build in the time for your craft.
 I placed mine to dry on the back of our pellet stove on top of the pellet storage compartment where it doesn’t get hot, yet it is close to the warmth. They ended up slightly curved – I think probably because they were quite thin and having a small amount of heat from the bottom only. If you make your ornaments thicker then make sure you leave a week for air drying – make them on a Monday and by the next Monday they’d be ready to decorate for sure.
Once dry you can decorate them or leave them plain and string them with pretty ribbon. Unwrapping my daughter’s ornament every year brings back so many memories. It’s one of my favourite crafts that she made in her Montessori class and I cherish it every year.


